Written by Derek Deal
I get asked a lot how i go about making my designs so i figured I’d give a general overview of how I work. The video above is a time lapse of the entire process of a design i did for The Amity Affliction. If you’re one of them readin’ types, I’ve broken it all down into steps below.
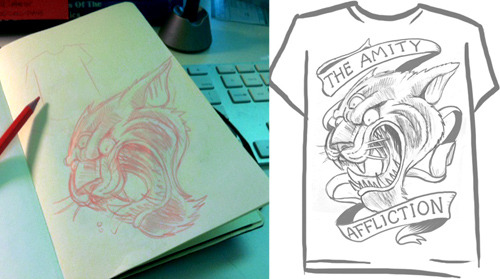
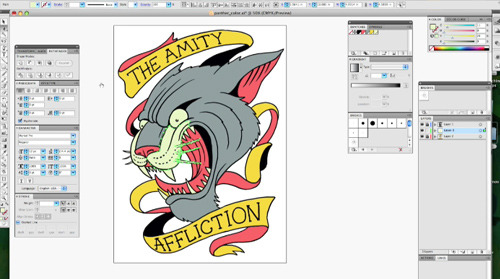
First comes the concept. I personally like keeping my ideas in a sketchbook or moleskine. It’s easier to flip through later and I find it easier to work out ideas with a pencil rather than digitally. For a commissioned piece, Ill work out the basic composition in tiny thumbnails and usually scan those and make slightly more refined sketches for the clients approval. In this instance I knew that I wanted the design to consist of one main central element, the panther head, so thats what i hashed out first. Afterwards, i scanned and desaturated the panther head in photoshop, quickly added some banners with my wacom tablet in Painter and then tossed it on a sketchy t shirt mock for approval.

Now the fun part, bringing this shit to life. I do all of my digital inking in Corel Painter X with a Wacom Intuous 3. Painter has a tendency to lag at times so I wouldnt necessarily recommend it, but Its way more responsive and authentic feeling when making lines than in Photoshop or Illustrator. I know a lot of people use Manga Studio to do their ink work but i’ve been hesitant to throw a wrench in my workflow. Painter is doing the job for now.
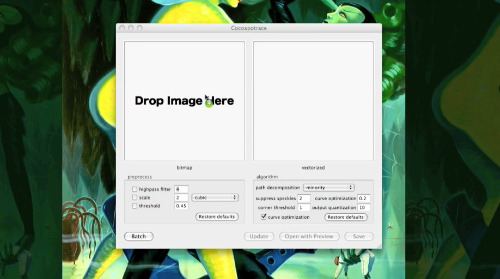
When I’m done with my lines, I export the image as a bitmap. From there i drag it into a free little program called Cocoapotrace which converts my bitmap into a vector eps.

From there, I open up the eps in Illustrator where I’ll start applying color. I scan the image for any breaks in the linework and repair them with the blob brush. I do this so that I can create shapes out of the negative areas of the drawing with the pathfinder tool.
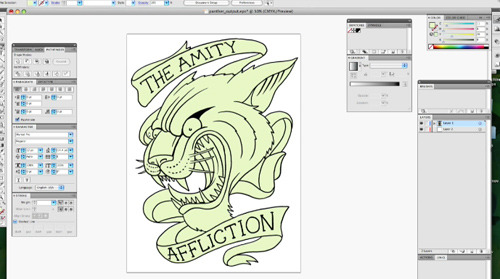
Next I create a large shape of color with the rectangle tool and place it behind the linework. Then “select all” and hit the ‘Merge’ icon in the Pathfinder toolbar. This takes your lines and the block of color in the back and makes new shapes out of them where the lines connect. Basically, flood filling all your shapes in one fell swoop. Here, ill use the magic wand tool to select all the blacks and move them to a new layer and lock it. Then ill go through and delete all the shapes in between the panther and banners that i dont need. The remaining shapes can now be easily selected individually have color added to them.
For any extra areas that i want to fill with color I use the pencil tool. 9 times out of 10 i can finish a piece right here in Illustrator but I want to exploit the brushes in photoshop. So why didnt i just start coloring in Photoshop? Because its a lot faster for me to fill my drawing with color in Illustrator and export it. You can get a really nice layered PSD right out of Illustrator by going to File>Export>PSD and then selecting Write Layers and checking Maximum Editability. Make sure you uncheck the Anti-alias as well.
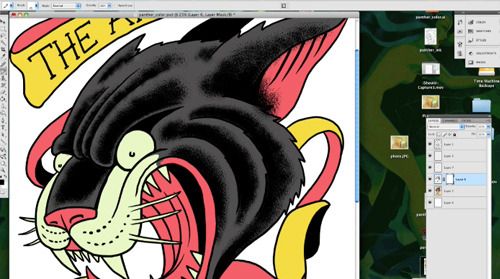
Now that I’m in PS i can use some aliased textured brushes to give the piece a more tattoo shaded look. I could have done it in Illustrator but Photoshop seems to handle the thousands of little dots much better. Ill build up each area where i want the stipple effect then create a mask and start chipping away at it to get the look im going for. I use a mask because i like to keep the shading aliased so its easier to separate, i would have lost that quality using the eraser since its inherently antialiased.
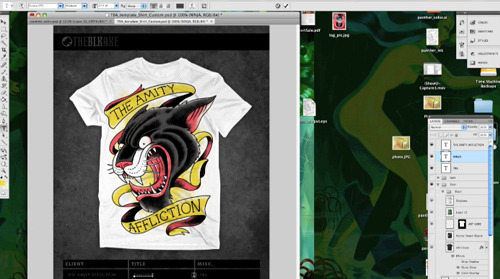
Oh snap, looky there, I’m done! Time to throw it onto one of our TBA mockups and send it off to the client.
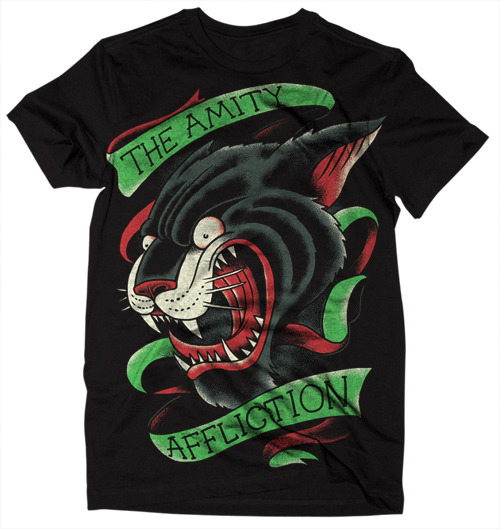
Good news! They like it, here’s a look at the final. Thanks for watching and reading! I hope it helps some of you out there!
Need an E-Commerce Website?
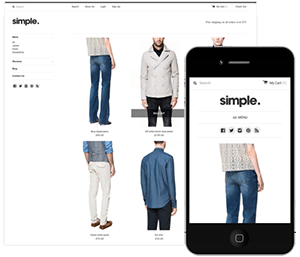 Shopify is perfect for beginners and experts. You don't need to have any technical or design experience to easily create a beautiful online store with your branding. Choose from tons of well designed e-commerce templates that look great on desktops, phones, and tablets. Easily customize, create pages, add products, and you're pretty much ready to accept payments. Plans come with a free no risk 30 day trial period.
Check out our in depth review of Shopify here and see why Shopify is our number 1 recommended shop for clothing companies.
Shopify is perfect for beginners and experts. You don't need to have any technical or design experience to easily create a beautiful online store with your branding. Choose from tons of well designed e-commerce templates that look great on desktops, phones, and tablets. Easily customize, create pages, add products, and you're pretty much ready to accept payments. Plans come with a free no risk 30 day trial period.
Check out our in depth review of Shopify here and see why Shopify is our number 1 recommended shop for clothing companies.