Warning: I have done my best to explain the screen printing process but I know there are a lot more knowledgeable people out there. If you want to add information or edit this let me know. My email is Kruse.jon@gmail.com
Printing is fun but there is a lot to learn. Here’s a list of printers if you don’t want to do your own printing.
Screen Printers
Threadbird
DTG
Printful
Types of printing
Heat Press
A heat press is a machine engineered to imprint a design with the application of heat and pressure for a preset period of time. I see this a lot on college sweatshirts and jerseys. They basically melt the design on the shirt. There are also plastisol transfers which are basically screen printed designs that are printed on a special heat transfer (release) paper instead of screen printing the design directly to a garment. You need to get these made by professionals.
DTG (Direct to Garment)
Direct to Garment printers spray the ink onto the shirt as they pass over it like an inkjet printer. They’re capable of millions of color combinations. Units range from $200 DIY to over $200,000 for some of the big guys. It’s still a relatively new technology so printers can expect some bumps in the road for them. Print times for dark garments are pretty slow, and ink prices are pretty high for MOST printers.
I’d suggest that anyone who gets a DTG printer build a business plan where they can A) print on white-light colored garments 100% of the time or B) sell direct to consumer and charge retail prices for dark shirts. With ink costs in excess of 6 dollars a shirt, it is business suicide to try to compete with the silk screeners. The plus side is that we can do small runs faster and cheaper than most other printing methods.
Screen printing
A screen is made of a piece of porous, finely woven fabric (originally silk, but typically made of polyester since the 1940s) stretched over a frame of aluminum or wood. Areas of the screen are blocked off with a non-permeable material to form a stencil, which is a positive of the image to be printed; that is, the open spaces are where the ink will appear.
I think a lot of people get into screen-printing and expect everything to work out perfectly. This usually doesn’t happen. My best advice is to spend as little money as possible and start the learning process. You can always buy more equipment down the road and you’ll be better educated on what four-color press to get, inks to use, and any other questions that come up.
Equipment
Film Positives
Photo Emulsion Kit
Silk-Screen
Scoop Coater
Plane of Glass
Exposure unit
Degreaser
Mineral Spirits
Gloves
Squeegee
Ink
Optional:
Heat gun or Flash unit
Printing press
You can get most of the supplies at a decent art store but some of the items may be harder to find. The degreaser, mineral spirits, glass, and 500-watt halogen work light (exposure unit) I bought at a hardware store. Silk screening supplies also has pretty good prices on equipment. Also check out ebay and craigslist because a lot of people give up and sell their stuff for cheap.
How screen printing works in a nutshell
Create your film positive.
Mix the Photo Emulsion.
Apply it to the screen with a scoop coater.
Place your film positive on top.
Expose the screen to UV lights.
Use a pressure washer and wash out the screen, revealing the image.
Place the screen on a press.
Put ink on the screen and use a squeegee to press the ink through the screen.
Cure the ink.
T-SHIRT!
I was in the process of writing a very detailed tutorial but ended up abandoning it because there are other great tutorials out there that does a pretty good job explaining everything.
Screen Printing: Cheap, Dirty, and at Home
How to Silkscreen Posters and Shirts
There are a couple of things I wanted to mention from my own experiences.
Silk Screens
When you buy a silk-screen at an art store they usually don’t tell you what mesh it is. These are good for basic printing and they’re usually 160 mesh, so don’t worry about it right now.
Film Positives
The first step is to print a film positive, it’s like a transparency. Print the image all black on the film positive so it blocks out UV rays. I remember I bought some transparencies at an office supply store and they were horrible. My printers ink didn’t stay on the screen and when I went to expose the screen the ink dripped all over the place. I talked to a guy at screener’s choice and he gave me some film positives to try out for free, they worked great. You can also get some at screenprinters.net . It’s very important that the black ink is opaque and no light gets through or you’ll be exposing the whole screen and your image won’t wash out. If light still goes through the black areas of the film positive you can print out a duplicate and place it on top.
Screen problems
My first screens sucked. My emulsion was really uneven. All I can say is make sure you put enough emulsion in the scoop coater. Also tilt the screen at an angle towards you and wait for the emulsion to reach the front of the scoop coater before you coat the screen. If your image isn’t washing out, the areas behind the film positive might’ve gotten exposed and this could be because your film positive wasn’t dark enough and let in UV rays. If this happens one solution is to use a toothbrush to try and scrub out the image on the screen. It’s probably best to start from scratch because you lose a lot of detail this way. In the future make sure your image on the film positive doesn’t let any UV light through.
Exposure Unit
Right now I have a pretty crappy setup where I use a mic stand and tied my 500 watt Halogen work light to it. You can get the light at Home Depot for $15. For my exposure time I have my light placed 16 inches above the screen and I expose the screen for about 13 minutes. Exposure times can very so you can use an exposure calculator to get better results. I’m going to make an exposure unit out of PVC and try to put up some plans later.
Printing Press
You could just place the screen on top of your shirt and print it that way, but if your going to do a decent amount a printing press will help you save time. Here’s a plan for a one color t-shirt press (plans will be added soon). You can also do a flat press like in the tutorial I mentioned before but you have to manually place the shirt every time. When you start doing more than one color you need to get a proper printing press with micro registration or you’ll spend all your time lining up the screens.
Curing the ink
I’ve used an oven and burned a couple t-shirts before. I’ve heard of people using heatguns but you have to make sure you hit everything or some of the areas could wash out when you do laundry. A flash unit will cure everything at the same time and is a good alternative to a conveyor dryer. I got one for a little over $200 on ebay.
Plastisol Ink
You need to use mineral spirits to take off plastisol ink. I think my shirts turned out a lot better with plastisol then the water based speedball inks I got at the art store.
You’re not going to be great at this your first time! This is really about learning from your mistakes, asking what you can do to fix it, and adapting.
Resources:
silk-screening tutorial
t-shirt forums
silkscreen supplies dvd
how to print t-shirts for fun and profit
online stores:
screeners choice
U.S. screen print
silk-screening supplies
Need an E-Commerce Website?
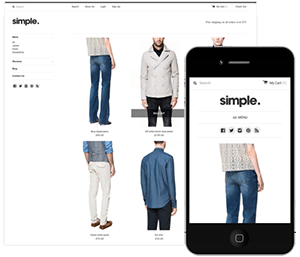 Shopify is perfect for beginners and experts. You don't need to have any technical or design experience to easily create a beautiful online store with your branding. Choose from tons of well designed e-commerce templates that look great on desktops, phones, and tablets. Easily customize, create pages, add products, and you're pretty much ready to accept payments. Plans come with a free no risk 30 day trial period.
Check out our in depth review of Shopify here and see why Shopify is our number 1 recommended shop for clothing companies.
Shopify is perfect for beginners and experts. You don't need to have any technical or design experience to easily create a beautiful online store with your branding. Choose from tons of well designed e-commerce templates that look great on desktops, phones, and tablets. Easily customize, create pages, add products, and you're pretty much ready to accept payments. Plans come with a free no risk 30 day trial period.
Check out our in depth review of Shopify here and see why Shopify is our number 1 recommended shop for clothing companies.